29 July 2013

Organizing the (Somewhat) Hasty Way

I've read many, MANY books on organization over the years, in an attempt to bring myself sanity. Or something. I've found that they all have their methods, but the basics boil down to the following:


1. Like goes with like.
The spices should be in one cabinet. The measuring cups and spoons all in one place. All the instruction manuals should live together in harmony. And so forth.

2. Real Estate--location, location, location.
Frequently used items should be the easiest to get to. Moderately used items should be moderately easy to get to. Rarely used items should be on top shelves, in attics, in the back of closets, etc. Sometimes this takes a little evaluation, but it makes for a more efficient home.

3. When in doubt, toss it out (don't hoard it!).
If you're unsure about how useful an item is, box it up and put it away for six months to a year. If you don't use it, you probably don't need it, but maybe someone else could.

4. Be flexible, be firm--do your maintenance.
If a location or a system isn't working, take the time to evaluate it and think of ways to improve it. Don't be afraid to change it, BUT don't ignore it.

5. Communication.
LABEL EVERYTHING. Then no one has an excuse for putting things in the wrong place.

Also:
Set goals--take care of your organizing in small chunks at a time. It's very easy to get overwhelmed.
Pace yourself--be content with achieving a little bit. A little bit is better than none at all.
Get rid of stuff--as you sort through a room, have three boxes labeled Keep, Toss, Give Away. Sometimes I'll add a To Be Fixed box, but that's it. Everything should fit into those categories. If you're undecided, go back to Rule #3.


And last, but never least:
Take a moment to enjoy your accomplishment!

How to Fold a Simple Gift Bag

 So the Dollar Store carries fun wrapping paper, and I picked up a ton of paper on clearance after Christmas at my favorite Hobby Lobby, and suddenly I'm awash in paper and remembering that I don't actually like to wrap gifts! Oh, the silliness.

But my daughter had a birthday party coming up, I didn't want to spend exorbitant amounts on decor and gift/treat bags and so forth, and the pins I found on making your own gift bags out of gift wrap just weren't quite cutting it for me. So I worked it out on my own. Or I stood on the shoulders of giants and worked out a simpler way. One of the two.

You'll need:
- a roll of wrapping paper
- scissors
- a glue stick
- pinking shears


First, cut a piece of paper into a 12 inch by 15 inch rectangle. My wrapping paper came with the fun little squares, so I didn't have to pull out the ruler. Yay! If you keep your rectangle at a 4:5 ratio, you'll end up with a proportionate bag. Trust me.

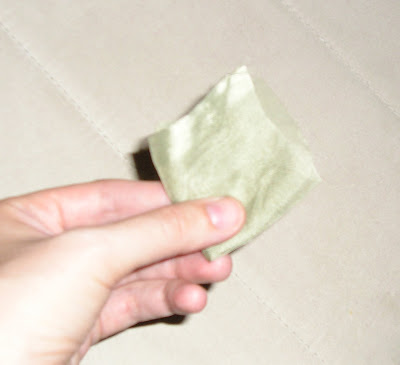
Now, fold your rectangle over by a third (on the long side). That is, in the case below, I made a fold in my paper at the 5 inch mark, or thereabouts, on the 15 inch side.

Glue stick time! Run your glue stick up and down the printed edge farthest away from the fold. (And remember, folks, always keep your cap on your glue stick to keep it from drying out.)

Now fold the other edge over to OVERLAP the edge you just applied glue to. RUB FIRMLY to help the glue stick. (Ha! No pun intended.)

I love using a glue stick. The glue dries so quickly! Anyway, now fold your bottom edge up by a third. In this case, I folded the bottom up about 4 inches. Crease it well.

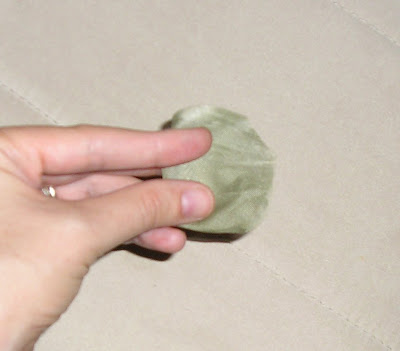
Now comes the origami-like part: Open up the two bottom edges of your bag while maintaining that first fold. (Yes, you must stick your pinkie out to accomplish this properly.)

Align the crease you see in the triangle that's forming with the crease on the inside of the bag, then firmly press down the edges of your triangle. I like to smooth mine out with my thumbnail.

Do the same on the other side. Then take the top part and fold down a flap JUST OVER the middle line.

See that little line in the middle of the bottom of the bag I'm making here? That's the line you want to cross (not those pesky lines in the sand...). Firmly crease your edges.

Now fold the bottom up to overlap the first flap that you made. Crease it, then open it out slightly and apply glue liberally wherever the two flaps meet each other, meet the paper, etc. You want this to be sturdy (well, as sturdy as gift wrap and a glue stick get, anyway).

Now, see that little diamond created by your flaps? Use it as a guide. Fold the side edge of your bag along the middle of the diamond (you can see the crease I made to show you). Fold it all the way to the top and crease it well.

Now, to make your life easier, flip the bag over and make that last fold go the other way.

Repeat on the other side.

Crease your folds really well--these will be more noticeable and need to fold in other directions to give the bag its shape. 

See? That's a beautiful crease. (My nine-year-old is taking the pictures at this point, using my phone, and neither of us are photographers. Obviously. I'm still teaching her the fine art of focusing.)

Reach into the bag and push it open.

Now the magic happens! Open out all the folds you made on the side and push the middle in a bit, just like a real bag.

I prefer the pinch-and-crease method, myself. 

Now press down on the sides and make those folds fulfill their destinies with a good, solid crease!

Et voila! A treat bag! (Focusing lessons are SO on the list for that child.)

It took more time to read this blog than it did for me to make the bag itself--it really isn't hard, with a little practice. You can get creative and attach a handle or bows or decorate it with stickers or what have you. Personally, after making eight gift bags in an hour, I was done. But this qualified as a Hasty Craft, and so I share it with you!

06 November 2012

It's Only Been Two Years...

...since I last posted, but I wanted to share the process by which this pie was produced:

First is the crust. This recipe was given to my mother eons ago, and I copied it down and took it to college with me. I love it for its very non-fussiness.

CRAZY PIE CRUST

Combine in a medium bowl:
1 cup shortening
2 cups flour
Use a rubber spatula to mix until like clay.

In a small bowl, mix:
6 T flour
2 T sugar
1 tsp salt
Mix well, then add 6 T water to make a batter. Pour over the flour/shortening mix. Cut in with a knife or a pastry cutter until the batter disappear. Set aside for 10-60 minutes.

After pie crust dough has rested, place half of it on a floured surface. Roll into a circle about 8" in diameter. Cut into quarters. Stack the quarters together and press. Flour both sides and roll out. Repeat for other half of dough.

The recipe makes enough for a double crust plus a few pie crust cookies.


Next comes the filling, found on Allrecipes.com (Apple Pie by Grandma Ople)

1/2 c unsalted butter
3 T all purpose flour
1/4 c water
1/2 c white sugar
1/2 c packed brown sugar
5 Granny Smith apples, peeled, cored, and sliced (this is a change from the 8 the recipe calls for)

Melt the butter in a saucepan. Stir in flour to form a paste. Add water, white sugar and brown sugar, and bring to a boil. Reduce temperature and let simmer. Take off heat and stir in apples.

(You could replace some of the water with vanilla extract and add cinnamon and other spices, but we didn't and the pie was still spectacular!)

Last is the streusel topping, also found on Allrecipes.com (Dutch Apple Pie with Oatmeal Streusel)

In a medium bowl combine 3/4 cup flour, 1/2 teaspoon cinnamon, 1/2 cup packed brown sugar, and 3/4 cup rolled oats. Mix thoroughly, then cut in 1/2 cup butter or margarine until mixture is crumbly. Sprinkle on top of pie filling and press in slightly.


It was a lot of work, but we did it as a Family Home Evening activity and had a good time. The best part was eating the results for breakfast with a little Cool Whip, because that's how we roll.

04 August 2010

The Easiest Cookie Recipe EVER

My favorite cookie recipe goes something like this:
1 box of cake mix
1 egg
1 stick of margarine, melted
Bake at 350 for 10-12 minutes.

See? Easy. Hasty-rific.

Anyway, I'd seen this recipe while looking at food blogs (something I try not to do very often--drool is not kind to a keyboard). The idea of a root beer flavored baked good was intriguing, but I didn't want to put all the work into the fancy recipe. So I hauled out my favorite cookie recipe, used a vanilla cake mix, and added a tablespoon of root beer extract.

Yum. So very yum.

And it's popular with the entire family. I made a 29-cookie batch less than 24 hours ago. While a number of them have been eaten by my most appreciative self, I have not been alone in their consumption.

It's easy to add other goodies to this recipe--butterscotch chips, chocolate chips, M&Ms, etc. Tell me what mash-ups you'd make, using what cake mix and what goodies?

29 July 2010

Flowers!!

Told you I'd be back!

So I came across these "boutique" flower tutorials during my daily trolling through the projects at One Pretty Thing. It caught my imagination. I made one. I liked it. So, in typical Karie fashion, I went back and cut out the material for eight more. Overboard much? Yep.

Now for the changes I made. In the Lipstick and Laundry (LaL) tutorial, she says to cut the flower shapes any way you want--just make sure you have a variety of sizes. In the Overdramatic Party Girl (OPG) tutorial, she cut circles--in various sizes. The key is the various sizes. I didn't want the regularity of shape the circles produced, but I wanted more layers than what LaL came up with. So this is what I did.

1. Cut a square of synthetic material.


2. Fold it in quarters.

Promise yourself that someday you'll learn how to use the camera you've had for six years.

3. Trim off all the corners.


4. Unfold and admire funky flower shape.

Don't worry about unevenness--it'll take care of itself over the flame.

5. Singe the outer edges.

Remember that directly over the flame is the hottest part. Think of the heat as a pillar. Manipulate material accordingly. DO NOT PUT YOUR MATERIAL DIRECTLY INTO THE FLAME UNLESS YOU LIKE BLACK, SHRIVELED FLOWERS.

6. Singe the inner edges. Do it sideways to make the petal curl.


Ta da!

Layer (8-10), sew together with a bead:


And back with felt for easier attachment of safety pins or brooch pins or what have you.


Enjoy!

18 May 2010

The Hasty Life

This poor little blog. I started it with so many good intentions and I have so many Hasty Crafts and Hasty Tips to share! But my time is limited, and as Sister Beck said in this last Conference, sometimes we moms can want to do many good things, but we must prioritize and do those things which are the MOST good and will bring us and our children closer to Christ. I may be paraphrasing here.

Am I shutting down the blog? Absolutely not. But my posting will happen in the dribs and drabs of my free time, instead of every three days. Or even every week. So keep your eyes open and your smiles ready--there will be more posts soon!

Until then, be well.

07 May 2010

Hasty Updates and Admissions

This Hasty Crafter's life has been turned upside-down for the last week and a half, but I'm doing my best to stay on top of things! Think of this post like a clip show from your favorite sitcom, but without the laugh track.

First, from the bleach pen experiment:
BleachResult
Here's the result from Enthusiasm's shirt. She loves that the bleach turned the design pink instead of white. My fingers are itching to try it one more time and see if I can't get some white inside the design. I definitely need to do that to my blue pants--I'm not fond of the subtle look there.

Now on to the admissions:
officemakeoverembarrass
That's my desk after it's been cleaned. *hangs head* I fought the paper monster, and the paper monster won. BUT! The coordinating drawer fronts and fleece over the chair help it a little bit. There is *some* cohesiveness to my life! And I decided to try something similar for my figurines shelf:
HastyAlteration
Some 12x12 scrapbook paper, some double-sided sticky tape, and voila! Emphasis on my eclectic collection.

Last, but not least, the Hasty Idea Basket:
thehastybasket
This is the place where I keep materials for the small projects that are perpetually in the back of my mind--dishcloths, crocheted hair ties, ribbon hair bands (tutorial next week!) and so on. I believe my method is called Organized Chaos. I'll take it. At least I know where everything is.